First-day Report
【背景】
全くの素人SIer(2年目)が無謀にもkagglerを目指してチャレンジしていく物語
背景知識なしで、どのくらい戦えるか。
【本日の抱負】
土日休日のどちらか5H・平日1Hのチャレンジを目指そう。
・本日の所要時間
4Hでした(13:30〜17:30)
【kaggle 1日目のレポート】
何があるかわからないけど、とりあえず実践からっしょ!
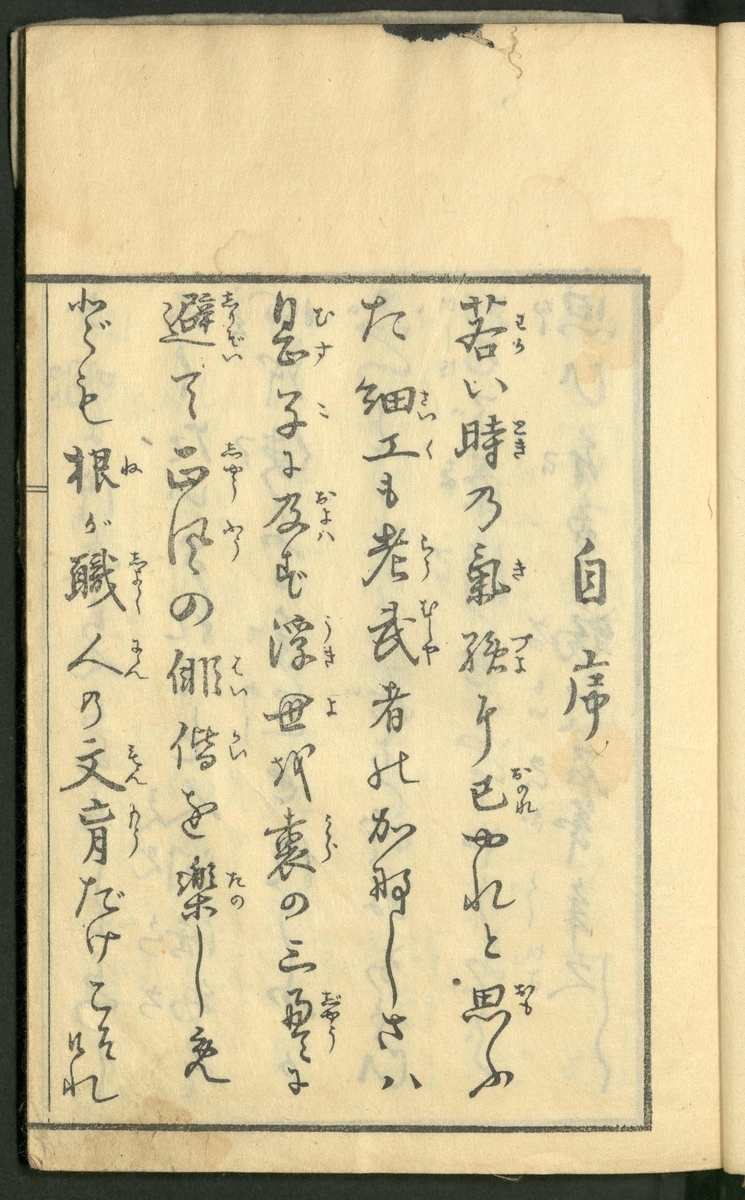
・崩し字翻訳のコンペにチャレンジしようかな
日本の字だし、他よりかはドメイン強いかな...
https://www.kaggle.com/c/kuzushiji-recognition/overview
全部英語やん!!
苦手だけど、ポイント訳してみるか...
Overview
- Description
目的:古い崩し字⇨現代日本語に翻訳するモデルを作る
崩し字読める人が少なくなっていてこまっている。
ML使ってこの技術を継承していくことが大事だよてきな。
Center for Open Data in the Humanities(CODH):
「人文学オープンデータ共同利用センター」なる活動が日本にあるらしい
崩し字のデータセット公開は2019/05〜
IIIF (International Image Interoperability)としてSWも公開してそう
北本 朝展さんがセンター長。
- Evaluation
F1スコア?だすみたい
ground truth bounding box とmatching label
ground truth bounding boxのフォーマット:{label X Y Width Height}
ground truth label:U+003F 1 1 10 10の場合、U+003F 3 3を予測する
詳しくはここみてね a Python version of the metric here
提出ファイル
image_id,labels
image_id,{label X Y} {...}
1ページに1200以上の予測はつけないこと。
- Timeline
- October 7, 2019 - Entry deadline. You must accept the competition rules before this date in order to compete.
- October 7, 2019 - Team Merger deadline. This is the last day participants may join or merge teams.
- October 14, 2019 - Final submission deadline.
終わってるやんwww
まあいいや、とりあえずやっていこう。(答えみる意味で)
- kuzushiji について
崩し字データセットの種類は4300文字
Data
データについて
んー、とりあえずDataSetダウンロードするか。
(Localは貧弱PCなので、Google Colabなるもの経由でドライブへ)
[下記記事を参考に]
qiita.com
・しょっぱなのfile uploadでエラーでたが、その状態でrerunしろとのことだったので
rerunしたらファイル選択画面になった。
・途中のコードは失敗したけど、なんとかダウンロードできたっぽい
!kaggle competitions download -c kuzushiji-recognition
⇨格納は /content/sample_data/以下にダウンロード
[Unicode_translation.cav] 4787件のtext
| Unicode | char |
|---|---|
[train_images.zip]
解凍画像の例 2404x3874 rgb
「100241706_00004_2.jpg」
!find /content/train_images/ -type f | wc -l
コマンドでファイル数カウント:3881

[train.csv]
画像に対応したラベル。
U+***はUnicodeに対応した文字
後ろはBounding boxの設定か?
3881x2より画像の数と一致
| image_id | labels |
| 100241706_00004_2 | U+306F 1231 3465 133 53 U+304C 275 1652 84 69 U+3044 1495 1218 143 69 U+3051 220 3331 53 91 U+306B 911 1452 61 92 U+306B 927 3445 71 92 U+306E 904 2879 95 92 U+5DE5 1168 1396 187 95 U+3053 289 3166 69 97 U+4E09 897 3034 121 107 U+306E 547 1912 141 108 U+3084 1489 2675 151 109 U+3068 1561 2979 55 116 U+5DF1 1513 2500 127 117 U+3082 1213 1523 72 119 U+3055 1219 3266 95 124 U+306E 259 2230 68 125 U+306E 1184 2423 169 125 U+4E16 849 2236 163 127 U+7D30 1144 1212 200 128 U+305D 316 3287 57 133 U+4EBA 217 2044 183 135 U+3051 277 2974 112 137 U+308C 201 3423 181 137 U+3060 243 2830 159 143 U+5F37 1479 2034 163 145 U+306E 1497 1567 123 152 U+305F 1164 952 145 153 U+3066 552 1199 97 155 U+4FF3 537 2095 176 155 U+6839 203 1439 184 156 U+304B 1188 2606 156 157 U+8AE7 549 2328 156 159 U+308C 1495 2784 168 159 U+5B50 891 1255 100 164 U+3092 584 2546 117 164 U+53CA 849 1588 151 164 U+8005 1192 2198 133 169 U+305A 889 1763 103 171 U+907F 513 945 181 171 U+6B63 539 1439 136 172 U+6587 192 2382 216 173 U+3075 1512 3371 147 176 U+6642 1465 1338 168 179 U+601D 1492 3175 159 180 U+306A 1191 2775 135 181 U+3081 593 3313 151 184 U+6D6E 868 1982 155 184 U+3092 873 2400 145 192 U+6C17 1504 1754 145 200 U+8077 208 1770 197 204 U+8001 1167 1687 152 208 U+6B66 1184 1942 171 208 U+697D 568 2762 133 209 U+3082 247 1159 116 212 U+76F2 253 2578 119 215 U+82E5 1465 951 172 216 U+81EA 1852 1736 104 219 U+3069 220 928 139 229 U+98A8 541 1619 147 236 U+306B 1521 2239 83 237 U+88CF 851 2608 169 237 U+7573 905 3189 103 244 U+606F 876 937 123 244 U+5E8F 1816 2096 152 296 U+3057 629 2985 27 300 U+3057 1243 2942 39 313 |
ここまでの実施コードはcolabのフォルダに保存しておく。
kaggle/kuzushiji/kuzushiji.ipynb
kaggle上の説明を貼り付けておく。提出の際はsample_submission.csvを参考にした方がよさそう。
- train.csv - the training set labels and bounding boxes.
image_id: the id code for the image.labels: a string of all labels for the image. The string should be read as space separated series of values whereUnicode character,X,Y,Width, andHeightare repeated as many times as necessary.
- sample_submission.csv - a sample submission file in the correct format.
image_id: the id code for the imagelabels: a string of all labels for the image. The string should be read as space separated series of values whereUnicode character,X, andYare repeated as many times as necessary. The default label predicts that there are the same two characters on every page, centered at pixels(1,1)and(2,2).
- unicode_translation.csv - supplemental file mapping between unicode IDs and Japanese characters.
- [train/test]_images.zip - the images.
Dataでできるのわかったのはこれくらいなので、次にnotebooksに移る。
Notebooks
というか、notebooksってなんだ?
・昔は「kernel」のタブが「notebooks」に変わった?
・Jupyter notebookと同じことがkaggleブラウザ上でできる機能?
っぽい感じ
一番数字が大きかった(今日時点で221)方の中身をみてみよう!
・anokasさんの中身
we need a font that can display the full range of Japanese characters. We're using Noto Sans, an open source font by Google which can display very almost all the characters used within this competition
[Font ダウンロード]
Noto Sansがフォントっぽい。日本語フォントをダウンロードする的な?
- Noto Fontsとは?
下記の記事がわかりやすかった
・表示されない文字(Tofu文字というらしいw)を撲滅する活動
・世界中のFontの標準目指してる?
・日本語はNoto Sans CJK JP
⇨CJKはダブルバイトの国(China/Korea/Janan)の頭字を表す
・65536種類に対応。
・CJK JPはGoogle/CJK JananeseはAdobeで日本語だけ2種類ある
# From https://www.google.com/get/noto/
!wget -q --show-progress https://noto-website-2.storage.googleapis.com/pkgs/NotoSansCJKjp-hinted.zip
!unzip -p NotoSansCJKjp-hinted.zip NotoSansCJKjp-Regular.otf > NotoSansCJKjp-Regular.otf
!rm NotoSansCJKjp-hinted.zip

font = ImageFont.truetype('./NotoSansCJKjp-Regular.otf', fontsize=50, encoding='utf-8')
colab上で引き続き作業する。
PIL/os/numpy/pandas/matplotlibをさくっとimport。
・NotoSansCJKjpのzipダウンロード⇨unzipし名前を*-Regular.otfに⇨font変更
※ .otfは「OpenType」の拡張子
[画像+Anotationの見える化]
さて、Visual化を引き続き取り組みます。
kaggleでは「相対パス」と「inputdata」に学習データ入れるなど
お作法があるそうですが...とりあえず表示したい!!
・colabのパスってどうなってるの?
さっきのNoto Fontsダウンロードが"/content/"直下にされていた。
全てのInput Dataは"/content/"直下に全て配置されている
⇨"df_train = pd.read_csv('../content/train.csv')"
これなら実行通った。
よし、Inputの変更をするぞ!
目標は描きコードを実行させる。
df_train = pd.read_csv('../input/train.csv')
unicode_map = {codepoint: char for codepoint, char in pd.read_csv('../input/unicode_translation.csv').values}
まずは下記を全てcontent/で実施
!mkdir input
!cp train.csv input/
!df_train = pd.read_csv('../input/train.csv')
エラー
そうだよね。直下にinput作成してやる。
!pwd
 /
!mkdir input/
 これでcontent/と同列にinput/が作成
!cp content/train.csv input/
df_train = pd.read_csv('../input/train.csv')
とおった!(content/と同フォルダにinput作成し、csvをcp)
全てのcontent/直下のファイルを移動させる。
準備OK!!
これ以降はログイン後!cd ../実施してroot直下("/")で全てのプログラムを実行する。
・unicodeのmap作成
unicode_map = {codepoint: char for codepoint, char in pd.read_csv('../input/unicode_translation.csv').values}
pandasのcsv読み込み。.valuesオプションはNumpy配列で読み込むらしい。
*memo*:pandas.DataFrameの構造とその作成方法 | note.nkmk.me
【def visualize_training_dataの説明】
関数を定義する。説明みた感じだと画像に対して、csvのラベルからboundingboxを抜き出し、重畳させた物を返す?
def visualize_training_data(image_fn, labels):
    # Convert annotation string to array
    labels = np.array(labels.split(' ')).reshape(-1, 5)

    # Read image
    imsource = Image.open(image_fn).convert('RGBA')
    bbox_canvas = Image.new('RGBA', imsource.size)
    char_canvas = Image.new('RGBA', imsource.size)
    bbox_draw = ImageDraw.Draw(bbox_canvas) # Separate canvases for boxes and chars so a box doesn't cut off a character
    char_draw = ImageDraw.Draw(char_canvas)

    for codepoint, x, y, w, h in labels:
        x, y, w, h = int(x), int(y), int(w), int(h)
        char = unicode_map[codepoint] # Convert codepoint to actual unicode character

        # Draw bounding box around character, and unicode character next to it
        bbox_draw.rectangle((x, y, x+w, y+h), fill=(255, 255, 255, 0), outline=(255, 0, 0, 255))
        char_draw.text((x + w + fontsize/4, y + h/2 - fontsize), char, fill=(0, 0, 255, 255), font=font)

    imsource = Image.alpha_composite(Image.alpha_composite(imsource, bbox_canvas), char_canvas)
    imsource = imsource.convert("RGB") # Remove alpha for saving in jpg format.
    return np.asarray(imsource)
labelの構造はtrain.csvの内容より(多分こいつが引数)
1枚の画像(image_id)に対し、複数のlabelが記載されている。
    # Convert annotation string to array
    labels = np.array(labels.split(' ')).reshape(-1, 5)
引数で与えられたlabelカラムのstring情報をarrayに変換(全て1セルに空白区切りで入っているため)
labels.split(' '):空白区切りでarrayに変換
.reshape(-1,5):-1はどうやら他の分け方によって自動に決まる値を表すらしい。
今回は 行方向:-1⇨好きにやって(自動で決まる)
列方向:5⇨5要素に分ける(下記の5要素)
Unicode character, X, Y, Width, and Height
だから行方向は指定しなくても勝手にわかれてくれるぜ!的な
    # Read image
    imsource = Image.open(image_fn).convert('RGBA')
    bbox_canvas = Image.new('RGBA', imsource.size)
    char_canvas = Image.new('RGBA', imsource.size)
    bbox_draw = ImageDraw.Draw(bbox_canvas) # Separate canvases for boxes and chars so a box doesn't cut off a character
    char_draw = ImageDraw.Draw(char_canvas)
さて、image_fnでしていされている画像を読み込むぜ
Image.conver:チートシート参考。どうやら透明度を含むらしい。
下記サイト参照するとImage.**だけで画像に対していろんなことできるっぽいね。
*memo*:PIL/Pillow チートシート - Qiita
| RGB | 8bit x 3 |
| RGBA | 8bit x 4 透明度(アルファ)付き |
Image.new:ベタ画像のImageオブジェクト作成。
第一引数:RGB設定
第二引数:サイズ(今回は元画像と同じ大きさで)
*memo*:Pythonの画像処理ライブラリPillow(PIL)の使い方 | note.nkmk.me
bboxはBoundingBox描画用のキャンバス(レイヤー)
charは認識した文字の描画用のキャンバス(レイヤー)
※多分イメージは画像の上に重ねる用の透明な板(その上に落書きして重ねる)
だから大きさは元画像と同じ
ImageDraw.Draw(im):ベタ画像(im)への描画準備。色々な図形を書き込める。
*memo*:Python, Pillowで円や四角、直線などの図形を描画 | note.nkmk.me
    for codepoint, x, y, w, h in labels:
        x, y, w, h = int(x), int(y), int(w), int(h)
        char = unicode_map[codepoint]
 # Convert codepoint to actual unicode character
 # Draw bounding box around character, and unicode character next to it
        bbox_draw.rectangle((x, y, x+w, y+h), fill=(255, 255, 255, 0), outline=(255, 0, 0, 255))
        char_draw.text((x + w + fontsize/4, y + h/2 - fontsize), char, fill=(0, 0, 255, 255), font=font)
さて、キャンバスの設定おわったし、Anotation結果を画像に書いていくぞー!
x, y:boundingboxの起点となる座標(矩形の左上の座標点??)
w:boundingboxの幅(横幅)
h:boundingboxの高さ(縦幅)
だと思う。
charはunicode_mapを参考に、labelに埋め込まれたcodepoint(さっきのlabel arrayの第一要素)をkeyとして、該当する文字を引っ張ってくる処理。
矩形を描くには描き設定。
draw.rectangle:さっきのメモを参照。
第一引数:xy表す。今回は⇨(左上のx座標, 左上のy座標, 右下のx座標, 右下のy座標)
第二引数:fillは図形を塗りつぶす色の設定
RGB=[225,225,225]は白、L(グレースケール)=0は黒(暗い)
第三引数:outlineは枠の色の設定
RGB=[225,0,0]は赤、L=225は白(明るい)
draw.text:テキストを挿入する。下記の設定らしい。
Draw.text(position, message, fill, font )
第一引数:positionは文字を各場所。
左上x座標:x+wより矩形の横の座標
左上y座標:y+h/2が矩形の中央。そこからfontsize分上方向にずらす。
第二引数:messageは書き込む文字。charはunicode_mapより取得したlabelの文字
第三引数:fillは文字の色を設定。RGB=[0,0,225]は青、L=225は白(明るい)
第四引数:fontは文字フォントの指定。fontはNotoSans CJK JPを採用している。
さてさて、これをfor分でlabelsの全てにぐるぐるー。
image_idに対して、boundingboxのキャンバスとcharキャンバスに矩形と文字が記入されていくよ。
    imsource = Image.alpha_composite(Image.alpha_composite(imsource, bbox_canvas), char_canvas)
    imsource = imsource.convert("RGB") # Remove alpha for saving in jpg format.
    return np.asarray(imsource)
最後は画像出力の準備。
Image.alpha_composite()
:透過度を加味した2枚のimageを合成する。
その前に、composite()が2枚のimageを合成する関数。
前提条件として、2枚の画像サイズは同じでなければならない。
composite()では透明度を反映した合成ができないため、alpha_composite()を使う(alpha値というらしい。alpha値いじることで半透明などができる)
今回は1. imsource(元画像)+boundingboxのキャンバスを合成
2. 1+charのキャンバスを合成
の手順でimsourceの画像にboundingboxとcharを合成している。
Image.convert():jpgはalpha値サポートしていないので"RGB"に戻す。
さて、最後のreturnについて
np.asarray:np.arrayと違い、asarrayで作成されたarrayリストはコピーが作られた場合
元のasarrayリストの値も同期して変更されるらしい。
つまり、「どっちが最新?」がなくなる。
*memo*:
【Python】Numpyにおける、np.arrayとnp.asarrayの違い|ぷんたむの悟りの書
【関数使ってやっと表示】
関数も完成したし、画像+Anotationがやっと表示できるぜ。
np.random.seed(1337)

for i in range(10):
    img, labels = df_train.values[np.random.randint(len(df_train))]
    viz = visualize_training_data('../input/train_images/{}.jpg'.format(img), labels)

    plt.figure(figsize=(15, 15))
    plt.title(img)
    plt.imshow(viz, interpolation='lanczos')
    plt.show()
・seed(1337)で乱数を生成
・train.csvから、ランダムでimage_idとlabelsのセットを読み込み(10枚実施)
・visualize_training_data()にimage(jpg)とlabelsを渡す⇨arrayゲット
・plotしていく。
figuresize:単位はインチ。デフォは(8,6) ※1inch=2.54cm
title():train.cavのimage_idはcharなのでそれがそのままtitleに
imshow():画像の表示設定
第一引数:「画像のnp.arrayリスト」を渡す(jpgはRGB)
第二引数:interpolationは画像を拡大させた時の補完方法のオプション
opencvの設定だけど、おそらく似たようなものがあると推定
今回のlanczosはもっとも高度な計算で補完するっぽい(6x6pix)
- nearest:nearest-neighbor
- bilinear:バイニリア
- bicubic:バイキュービック
- lanczos:ランチョス
*memo*:Notebook(OpenCVの拡大補完の例)
:画素の補間(Nearest neighbor,Bilinear,Bicubic) 画像処理ソリューション
無事に動作完了!
アノテーション情報を加味した画像を出力するように設定追加
    plt.imshow(viz, interpolation='lanczos')
    plt.show()
    outimg = Image.fromarray(viz)
    outimg.save('../input/{}.jpg'.format(img))
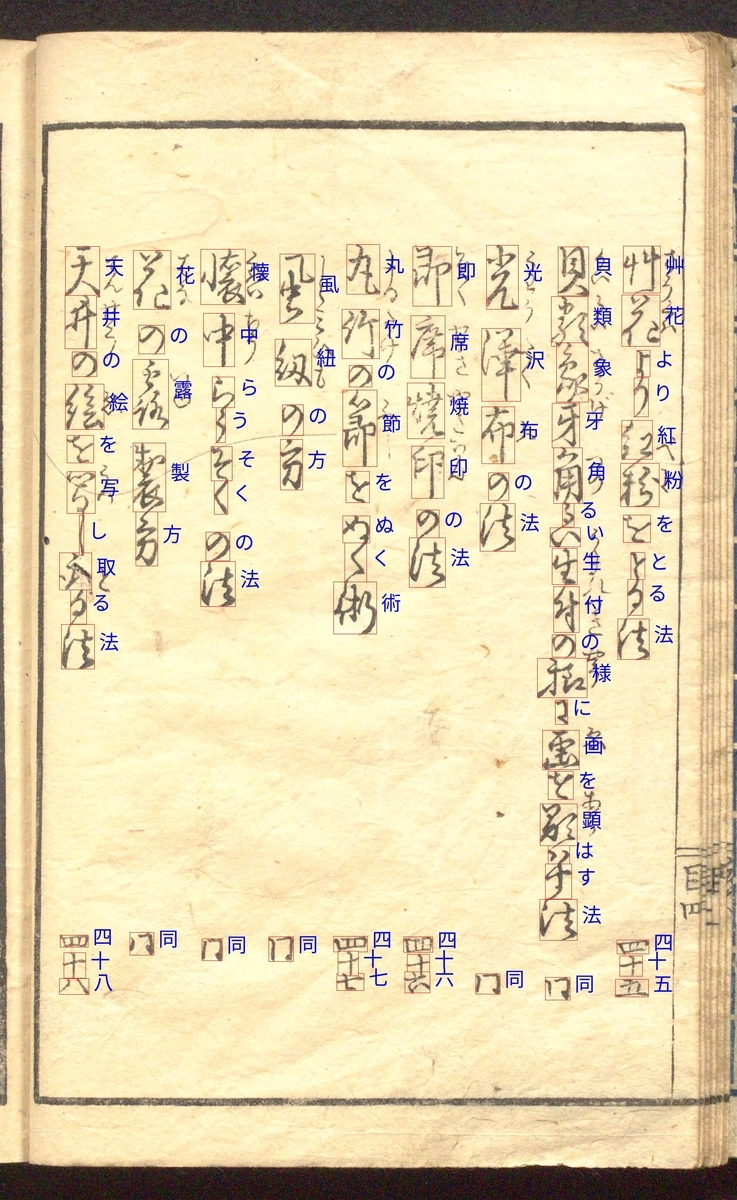
出力させた結果がこちら。
うん。うまくいっている感じかな?
とりあえずは今日はここまでー!!
